Instalasi LEMP Stack di Ubuntu 20.04 LTS
1 people liked this article
A. Pendahuluan
Nginx merupakan salah satu web server terpopuler di dunia, yang digunakan oleh banyak perusahaan untuk menyimpan aplikasi berbasis web karena fitur dan keunggulannya, yaitu lebih menggunakan resource server yang sedikit dibandingkan dengan Apache.
Berikut merupakan langkah-langkah untuk melakukan instalasi dan konfigurasi LEMP pada sistem operasi Ubuntu 20.04 pada layanan NEO.
B. Konfigurasi dan Instalasi
1. REQUIREMENT
1. Layanan Neo Virtual Compute paket starter dengan minimum alokasi resource 1GB CPU dan 2GB RAM.
2. OS Ubuntu 20.04
2. KONFIGURASI SERVER
1. Pembuatan network menggunakan referensi: https://kb.biznetgio.com/id_ID/98221-neo-virtual-compute/konfigurasi-network-pada-neo-virtual-compute
2. Pembuatan server menggunakan referensi : https://kb.biznetgio.com/id_ID/98221-neo-virtual-compute/membuat-neo-virtual-compute-melalui-portal-neo-cloud
3. Pembuatan aturan Security Group untuk traffik network menggunakan referensi: https://kb.biznetgio.com/id_ID/gio-public-v2/membuat-nat-snat-dan-dnat
3. INSTALASI NGINX
1. Update repository
apt update 2. Install paket nginx
apt install nginx -y3. Buat server blocks
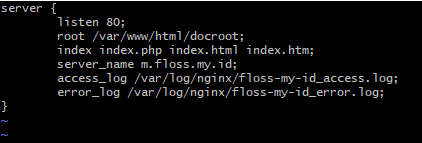
vi /etc/nginx/sites-enabled/neocloud.confserver {
listen 80;
root /var/www/html/docroot;
index index.php index.html index.htm;
server_name m.floss.my.id;
access_log /var/log/nginx/floss-my-id_access.log;
error_log /var/log/nginx/floss-my-id_error.log;
}
4. Buat file test pada /var/www/html/docroot
echo "Hello NeoCloud !" > index.html;5. Reload konfigurasi nginx
nginx –tservice nginx reload
6. Testing
curl m.floss.my.id -i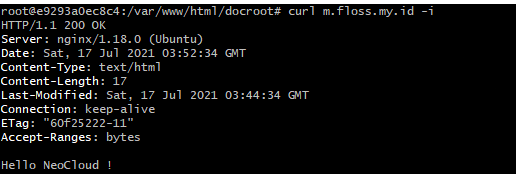
4. INSTALASI PHP-FPM
1. Install repository Ondrej
apt install software-properties-common
add-apt-repository ppa:ondrej/php
2. Instalasi paket PHP
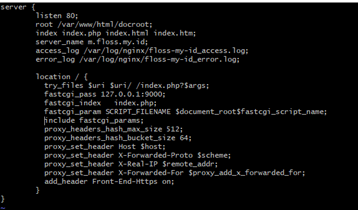
apt install php php-fpm3. Edit konfigurasi server blocks
vi /etc/nginx/sites-enabled/neocloud.confserver {
listen 80;
root /var/www/html/docroot;
index index.php index.html index.htm;
server_name m.floss.my.id;
access_log /var/log/nginx/floss-my-id_access.log;
error_log /var/log/nginx/floss-my-id_error.log;
location / {
try_files $uri $uri/ /index.php?$args;
fastcgi_pass 127.0.0.1:9000;
fastcgi_index index.php;
fastcgi_param SCRIPT_FILENAME $document_root$fastcgi_script_name;
include fastcgi_params;
proxy_headers_hash_max_size 512;
proxy_headers_hash_bucket_size 64;
proxy_set_header Host $host;
proxy_set_header X-Forwarded-Proto $scheme;
proxy_set_header X-Real-IP $remote_addr;
proxy_set_header X-Forwarded-For $proxy_add_x_forwarded_for;
add_header Front-End-Https on;
}
}
4. Ubah konfigurasi PHP-FPM
sed -i "s@listen = /run/php/php7.4-fpm.sock@listen = 127.0.0.1:9000@g" /etc/php/7.4/fpm/pool.d/www.conf5. Buat file check php
echo "<?phpphpinfo();?>" > info.php

6. Restart service php-fpm dan nginx
service nginx restart; service php7.4-fpm restart * Restarting nginx nginx
* Restarting PHP 7.4 FastCGI Process Manager php-fpm7.4

7. Uji coba
curl m.floss.my.id/info.php –i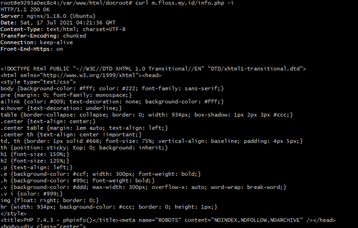
5. INSTALASI MARIADB
1. Instalasi paket mariadb
apt install mariadb-server2. cek versi mariadb
mariadb –v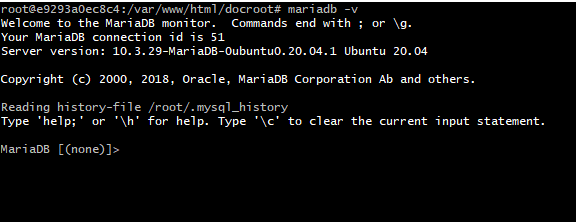
C. Kesimpulan
Artikel ini menjelaskan cara instalasi dan konfigurasi stack LEMP (Linux, Nginx, MySQL/MariaDB, PHP) pada sistem operasi Ubuntu 20.04 dalam layanan NEO
Semoga artikel ini dapat membantu Anda. Temukan bantuan lainnya melalui Knowledge Base Biznet Gio. Jika Anda masih memiliki kendala silahkan hubungi support@biznetgio.com atau (021) 5714567.
Popular Articles
-
Cara Install & Konfigurasi Monitoring Cacti Serta Mengetahui Fungsi Fitur Pada Cacti
11 people say this guide was helpful
-
Cara Mengaktifkan Telnet pada Windows 7, 8 dan 10
4 people say this guide was helpful
-
Install dan Konfigurasi Samba Server pada Ubuntu
4 people say this guide was helpful
-
Jenis-Jenis Software Virtualisasi untuk Membuat Virtual Machine
7 people say this guide was helpful