Membangun Nginx Dengan Pagespeed di Centos 6
0 people liked this article
A. Pendahuluan
Pagespeed merupakan salah satu modul yang dimiliki oleh web server seperti apache ataupun Nginx. Modul tersebut berguna untuk memperkecil aset static website seperti CSS, Javascript sehingga pagespeed website semakin kecil. Hal tersebut yang membuat akses website menjadi lebih cepat dan memiliki performa yang tinggi.
B. Tata Cara
Dalam tutorial ini, kami akan menjelaskan cara menginstal Nginx dengan ngx_pagespeed di OS Centos untuk meningkatkan kinerja webserver Nginx.
1. Instal Nginx
Untuk membangun Nginx dengan ngx_pagespeed diperlukan update OS dan unduh paket-paket berikut untuk diinstal pada system.
# yum update

# yum install gcc-c++ pcre-devel pcre-devel zlib-devel make unzip openssl-devel

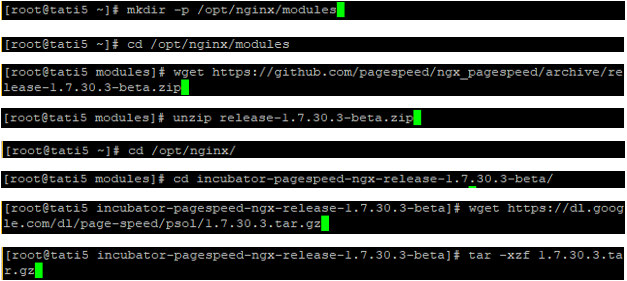
# mkdir -p /opt/nginx/modules
# cd /opt/nginx/modules
# wget https://github.com/pagespeed/ngx_pagespeed/archive/release-1.7.30.3-beta.zip
# unzip release-1.7.30.3-beta.zip
# cd incubator-pagespeed-ngx-release-1.7.30.3-beta/
# wget https://dl.google.com/dl/page-speed/psol/1.7.30.3.tar.gz
# tar -xzf 1.7.30.3.tar.gz

2. Konfigurasi dan Kompilasi Nginx dengan ngx_Pagespeed
Selanjutnya pindah ke direktori nginx-1.4.5, dan melakukan konfigurasi Nginx
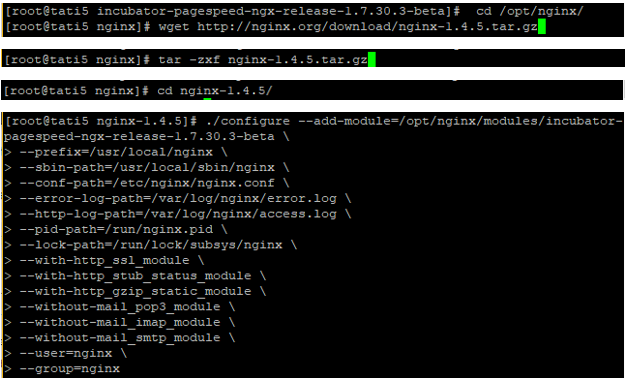
# cd /opt/nginx/
# wget http://nginx.org/download/nginx-1.4.5.tar.gz
# tar -zxf nginx-1.4.5.tar.gz
# cd nginx-1.4.5/
# ./configure --add-module=/opt/nginx/modules/ incubator-pagespeed-ngx-release-1.7.30.3-beta \
--prefix=/usr/local/nginx \
--sbin-path=/usr/local/sbin/nginx \
--conf-path=/etc/nginx/nginx.conf \
--error-log-path=/var/log/nginx/error.log \
--http-log-path=/var/log/nginx/access.log \
--pid-path=/run/nginx.pid \
--lock-path=/run/lock/subsys/nginx \
--with-http_ssl_module \
--with-http_stub_status_module \
--with-http_gzip_static_module \
--without-mail_pop3_module \
--without-mail_imap_module \
--without-mail_smtp_module \
--user=nginx \
--group=nginx

Kompilasi dan install Nginx
# make
# make install

Cek status dan versi Nginx dan statusnya
# nginx –v
# service nginx status

3. Mengaktifkan modul ngx_pagespeed
Masuk ke berkas berikut untuk nenambahkan pagespeed ke nginx
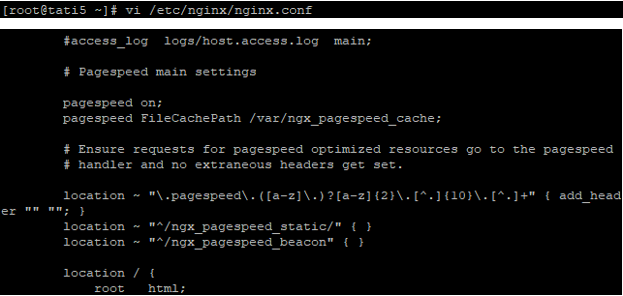
# vi /etc/nginx/nginx.conf
Kemudian tambahkan baris berikut:
# Pagespeed main settings
pagespeed on;
pagespeed FileCachePath /var/ngx_pagespeed_cache;
# Ensure requests for pagespeed optimized resources go to the pagespeed
# handler and no extraneous headers get set.
location ~ "\.pagespeed\.([a-z]\.)?[a-z]{2}\.[^.]{10}\.[^.]+" { add_header "" ""; }
location ~ "^/ngx_pagespeed_static/" { }
location ~ "^/ngx_pagespeed_beacon" { }

4. Setup init script dan aktifkan Nginx
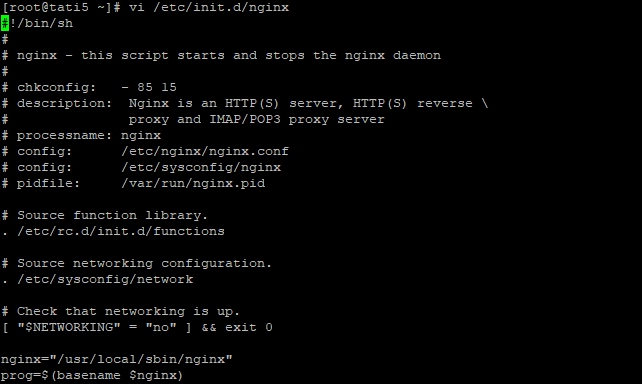
Buat init script di /etc/init.d/nginx, dan tambahkan berkas berikut:
#!/bin/sh
#
# nginx - this script starts and stops the nginx daemon
#
# chkconfig: - 85 15
# description: Nginx is an HTTP(S) server, HTTP(S) reverse \
# proxy and IMAP/POP3 proxy server
# processname: nginx
# config: /etc/nginx/nginx.conf
# config: /etc/sysconfig/nginx
# pidfile: /var/run/nginx.pid
# Source function library.
. /etc/rc.d/init.d/functions
# Source networking configuration.
. /etc/sysconfig/network
# Check that networking is up.
[ "$NETWORKING" = "no" ] && exit 0
nginx="/usr/local/sbin/nginx"
prog=$(basename $nginx)
NGINX_CONF_FILE="/etc/nginx/nginx.conf"
[ -f /etc/sysconfig/nginx ] && . /etc/sysconfig/nginx
lockfile=/var/lock/subsys/nginx
make_dirs() {
# make required directories
user=`$nginx -V 2>&1 | grep "configure arguments:" | sed 's/[^*]*--user=\([^ ]*\).*/\1/g' -`
if [ -z "`grep $user /etc/passwd`" ]; then
useradd -M -s /bin/nologin $user
fi
options=`$nginx -V 2>&1 | grep 'configure arguments:'`
for opt in $options; do
if [ `echo $opt | grep '.*-temp-path'` ]; then
value=`echo $opt | cut -d "=" -f 2`
if [ ! -d "$value" ]; then
# echo "creating" $value
mkdir -p $value && chown -R $user $value
fi
fi
done
}
start() {
[ -x $nginx ] || exit 5
[ -f $NGINX_CONF_FILE ] || exit 6
make_dirs
echo -n $"Starting $prog: "
daemon $nginx -c $NGINX_CONF_FILE
retval=$?
echo
[ $retval -eq 0 ] && touch $lockfile
return $retval
}
stop() {
echo -n $"Stopping $prog: "
killproc $prog -QUIT
retval=$?
echo
[ $retval -eq 0 ] && rm -f $lockfile
return $retval
}
restart() {
configtest || return $?
stop
sleep 1
start
}
reload() {
configtest || return $?
echo -n $"Reloading $prog: "
killproc $nginx -HUP
RETVAL=$?
echo
}
force_reload() {
restart
}
configtest() {
$nginx -t -c $NGINX_CONF_FILE
}
rh_status() {
status $prog
}
rh_status_q() {
rh_status >/dev/null 2>&1
}
case "$1" in
start)
rh_status_q && exit 0
$1
;;
stop)
rh_status_q || exit 0
$1
;;
restart|configtest)
$1
;;
reload)
rh_status_q || exit 7
$1
;;
force-reload)
force_reload
;;
status)
rh_status
;;
condrestart|try-restart)
rh_status_q || exit 0
;;
*)
echo $"Usage: $0 {start|stop|status|restart|condrestart|try-restart|reload|force-reload|configtest}"
exit 2
esac
Berikut contoh isi berkas yang sudah ditambahkan:

Buat direktori modul untuk situs web yang akan dibangun, membuat user dan mengatur hak akses yang sesuai pada direktori
# mkdir -p /var/ngx_pagespeed_cache
# chown -R nobody:nobody /var/ngx_pagespeed_cache

# useradd -r nginx
# chmod +x /etc/init.d/nginx

Cek status nginx dengan command
# nginx –t

Setelah itu restart server nginx
# service nginx restart

5. Test Nginx dengan ngx_pagespeed
Sekarang mengecek apakah ngx-pagespeed sudah bekerja dengan pada nginx menggunakan perintah curl berikut:
# curl -s -I http://localhost

Jika hasilnya berisi HTTP 200 tertera pada header dan X-Page-Speed dengan nomor versi PageSpeed, artinya sudah berfungsi dengan baik.
C. Kesimpulan
Untuk menangani pagespeed sebuah website yang lambat, Anda bisa menggunakan modul pagespeed ini pada Nginx Anda. Selain itu modul tersebut bisa meningkatkan performa website menjadi lebih baik.
Semoga artikel ini dapat membantu Anda. Temukan bantuan lainnya melalui Knowledge Base Biznet Gio. Jika Anda masih memiliki kendala silakan hubungi Support Biznet GIO melalui email support@biznetgio.com atau live chat maupun WA ke website www.biznetgio.com dan bisa juga melalui telepon ke nomor (021) 5714567.
Sekian dan semoga bermanfaat.
Popular Articles
-
Cara Install & Konfigurasi Monitoring Cacti Serta Mengetahui Fungsi Fitur Pada Cacti
10 people say this guide was helpful
-
Cara Mengaktifkan Telnet pada Windows 7, 8 dan 10
4 people say this guide was helpful
-
Install dan Konfigurasi Samba Server pada Ubuntu
3 people say this guide was helpful
-
Jenis-Jenis Software Virtualisasi untuk Membuat Virtual Machine
6 people say this guide was helpful