Install OSTicket sebagai Aplikasi Open Source Ticketing System
0 people liked this article
A. Pendahuluan
OSTicket merupakan aplikasi yang dapat anda gunakan untuk membuat sistem ticket open-source pada operating system Linux. OSTicket support berbagai jenis database seperti MySQL, PostgreSQL dan dapat anda intergrasikan dengan LDAP/Active directory sebagai otentikasi terpusatnya.
Spesifikasi:
-
VM dengan resource 2 Core vCpu, 2 GB Ram dan OS Linux Ubuntu 20.04
B. Instalasi dan Konfigurasi
Install PHP extensions
sudo apt install -y php-common php-fpm php-pear php-cgi php-net-socket php-bcmath php-gd php-imap php-intl php-apcu php-cli php-mbstring php-curl php-mysql php-json php-xml Install Apache server
sudo apt install apache2
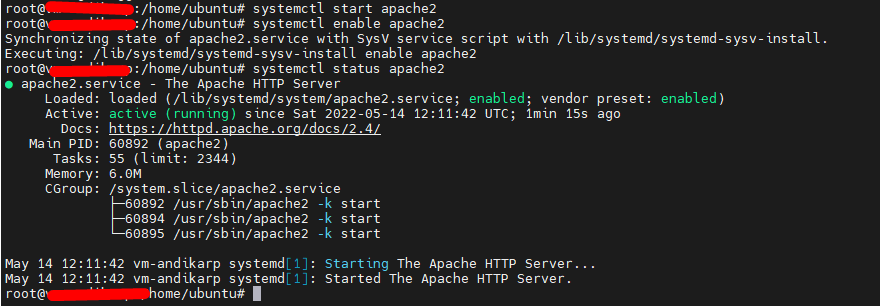
Start dan enable service apache2
sudo systemctl start apache2
sudo systemctl enable apache2
Install MariaDB database and konfigurasi
sudo apt install mariadb-server lalu
sudo mysql_secure_installation
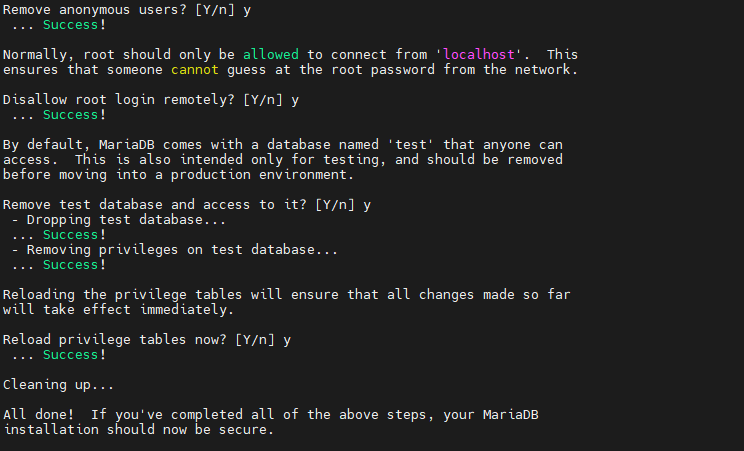
lalu buat autentifikasi untuk database ostiket


isi dengan perintah berikut:
UPDATE mysql.user SET plugin = 'mysql_native_password' WHERE User = 'root';

FLUSH PRIVILEGES;
QUIT;
Setelah server MariaDB/MySQL terinstal, lanjutkan membuat database untuk osTicket. Login ke server database Anda sebagai pengguna root dan buat database untuk osTicket

mysql -u root -p
Create database untuk ostiket

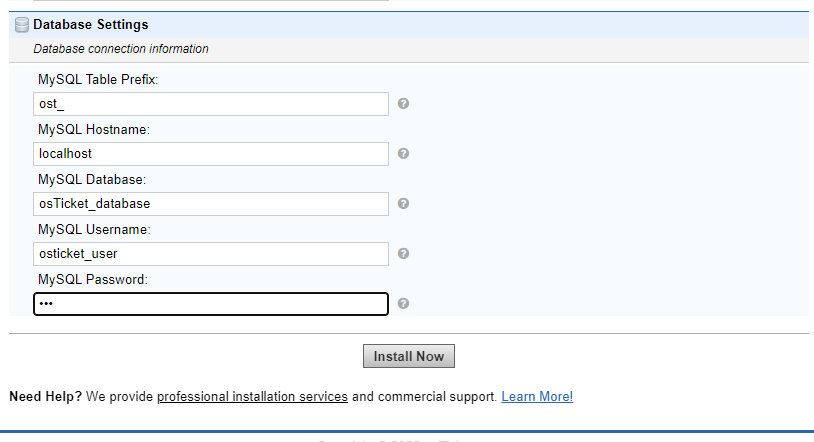
CREATE DATABASE osTicket_database;
CREATE USER 'osTicket_user'@'localhost' IDENTIFIED BY 'password';
GRANT ALL PRIVILEGES ON osTicket_database.* TO osTicket_user@localhost IDENTIFIED BY 'password';
FLUSH PRIVILEGES;
Create Directory untuk osTicket
Direktori dibuat untuk aplikasi osTicket yang memberikan jalur tempat direktori dibuat .

sudo mkdir -p /var/www/os_ticket
sudo chown -R $USER:$USER /var/www/os_ticket
cd /var/www/os_ticket
wget https://github.com/osTicket/osTicket/releases/download/v1.15.4/osTicket-v1.15.4.zip
unzip osTicket-v1.15.2.zip
rm osTicket-v1.15.2.zip
Setelah itu
sudo cp upload/include/ost-sampleconfig.php upload/include/ost-config.php
sudo chown -R www-data:www-data /var/www/os_ticket

sudo chmod -R 755 /var/www/os_ticket
Buat sebuah Virtual Host
File konfigurasi harus dibuat di bawah direktori path /etc/apache2/sites-available untuk menjalankan osTicket dengan server apache
a2dissite 000-default.conf lalu konfigurasi virtual host tersebut
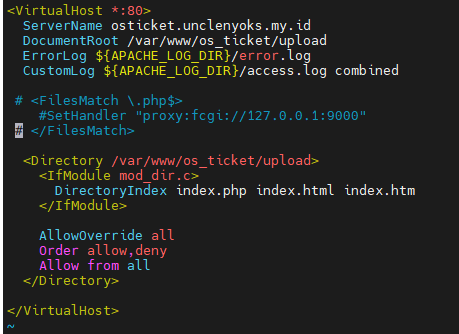
<VirtualHost *:80>
ServerName osticket.unclenyoks.my.id
DocumentRoot /var/www/os_ticket/upload
ErrorLog ${APACHE_LOG_DIR}/error.log
CustomLog ${APACHE_LOG_DIR}/access.log combined
  #<FilesMatch \.php$>
  #  SetHandler "proxy:fcgi://127.0.0.1:9000"
  #</FilesMatch>
<Directory /var/www/os_ticket/upload>
<IfModule mod_dir.c>
DirectoryIndex index.php index.html index.htm
</IfModule>
AllowOverride all
Order allow,deny
Allow from all
</Directory>
</VirtualHost>
Setelah itu buka alamat ostiket yang sudah dibuat pada web broser, maka akan muncul seperti tampilan berikut
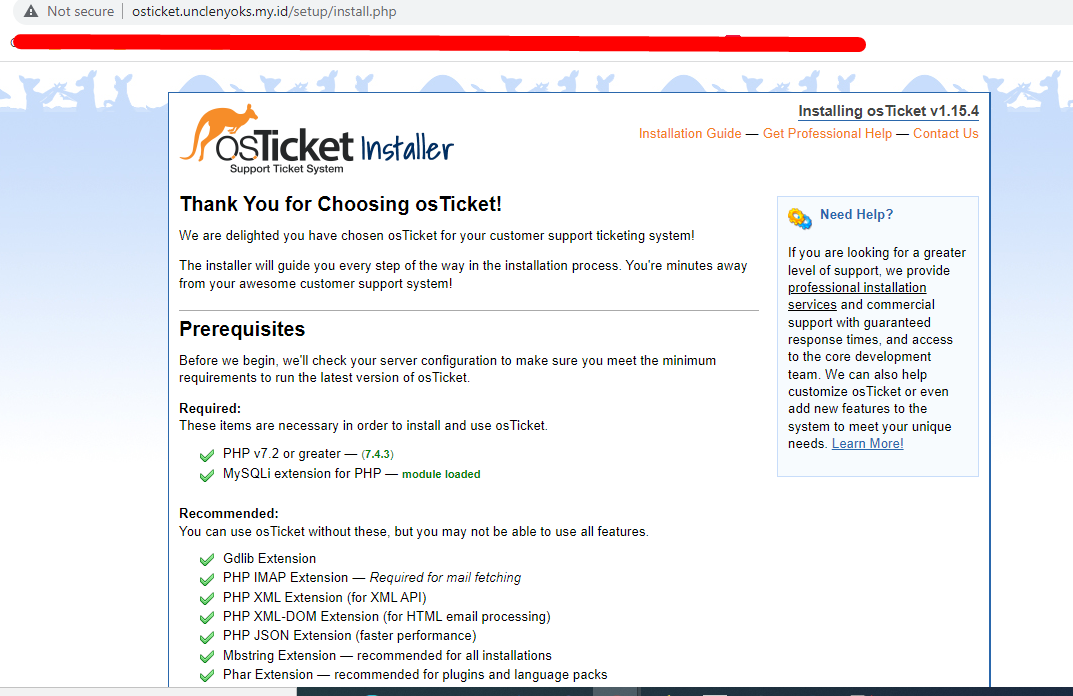
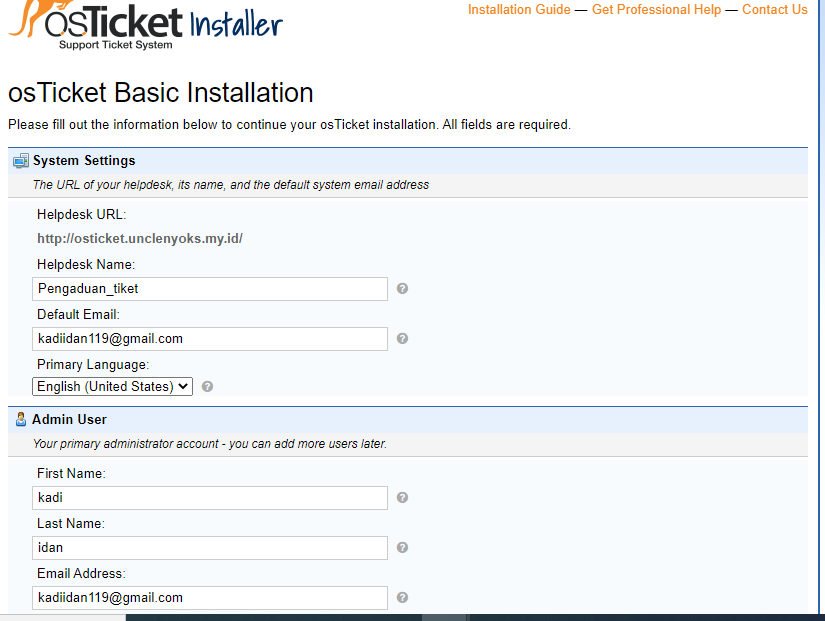
Lalu dapat dikonfigurasikan untuk osticket sesuai gambar dibawah
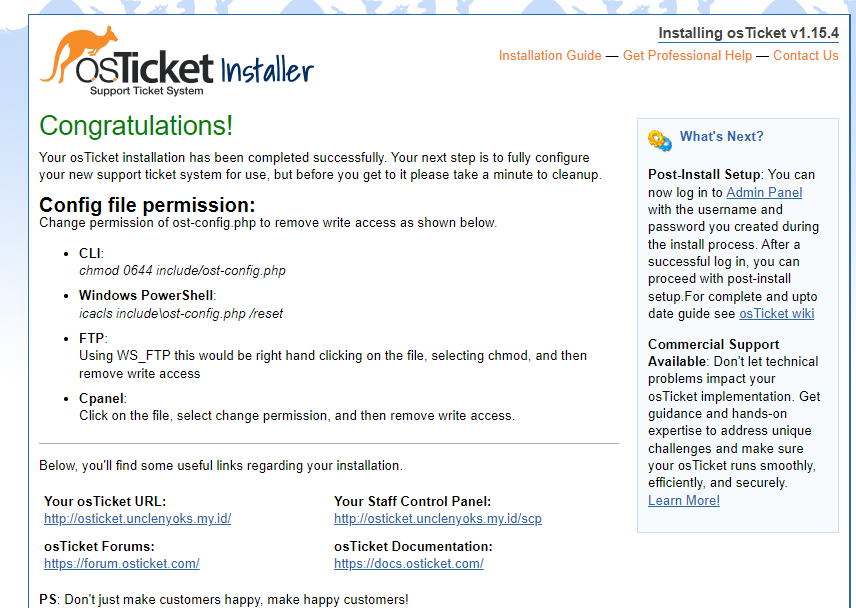
Apabila konfigurasi telah selesai maka akan muncul tampilan informasi mengenai OSticket tersebut.
C. Hasil Uji Coba
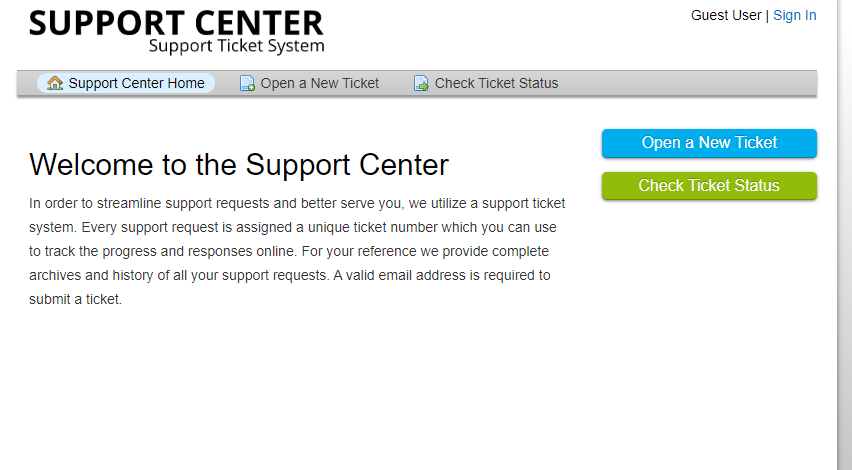
Apabila konfigurasi sesuai anda dapat melihat tampilan porrtal OSTicket seperti berikut ini :
D. Kesimpulan
Jika Anda memerlukan system ticketing, Anda bisa memilih aplikasi osticket selain opensource, osticket juga memudahkan Anda berkoordinasi antar tim atau departement.
Semoga panduan ini membantu Anda. Temukan bantuan lainnya melalui Knowledge Base Biznet Gio. Jika Anda masih memiliki kendala silahkan hubungi support@biznetgio.com atau (021) 5714567.
Popular Articles
-
Cara Install & Konfigurasi Monitoring Cacti Serta Mengetahui Fungsi Fitur Pada Cacti
11 people say this guide was helpful
-
Cara Mengaktifkan Telnet pada Windows 7, 8 dan 10
4 people say this guide was helpful
-
Install dan Konfigurasi Samba Server pada Ubuntu
4 people say this guide was helpful
-
Jenis-Jenis Software Virtualisasi untuk Membuat Virtual Machine
7 people say this guide was helpful