How to Install and Configure Zabbix on CentOS 7
0 people liked this article
A. Introduction
Zabbix is an open source monitoring tool for network services, network hardware, servers, and application. Designed to track and monitor the status of your system and servers. Zabbix offers support for many database systems - including MySQL, PostgreSQL, SQLite, and IBM DB2 - to store data. Zabbix backend is written in C, and the frontend is written in PHP.
In this tutorial, we will show you step-by-step how to install and configure an open source monitoring system Zabbix 3.4 on the CentOS 7 system. This guide will cover some topics, including installation and configuration of the LAMP Stack for our Zabbix installation, and how to change the default password for Zabbix admin web UI.
B. Configuration and Instalation
Server spesification
- OS centos 7.
- Zabbix 5.0 LTS version
- Web Server Apache Apache/2.4.6
- Database Mysql Server Ver 15.1
- NEO Virtual Compute with the spesification min SM4.2
Install Apache/hhtpd
sudo yum -y install httpdAfter the installation is complete, start the service and enable it to launch every time at system boot.
systemctl start httpd
systemctl enable httpd
Install and Configure PHP 7.2 on CentOS 7
sudo yum -y install php php-pear php-cgi php-common php-mbstring php-snmp php-gd php-xml php-mysql php-gettext php-bcmathsudo systemctl restart httpdInstall and Configure MariaDB
sudo yum -y install mariadb-serverAfter the installation is complete, start the service and enable it to launch everytime at system boot.
systemctl start mariadb
systemctl enable mariadb
Now run the command below to configure MariaDB root password.
mysql_secure_installationWe need to create a new database for our Zabbix installation. We will create a new database and user database zabbix.
Login to mysql
sudo mysql -uroot -p
create database zabbix character set utf8 collate utf8_bin;
create user zabbix@localhost identified by 'password';
grant all privileges on zabbix.* to zabbix@localhost;
set global log_bin_trust_function_creators = 1;
quit;
Install and Configure Zabbix Server
Install Zabbix Repository
sudo rpm -Uvh https://repo.zabbix.com/zabbix/5.0/rhel/7/x86_64/zabbix-release-5.0-1.el7.noarch.rpm
 sudo yum clean all
Install Zabbix server
sudo yum install zabbix-server-mysqlInstall Zabbix Agent
sudo yum install zabbix-agentInstall Zabbix frontend
sudo yum install centos-release-scl Edit the /etc/yum.repos.d/zabbix.repo file, change its value to 1, and enable the zabbix-frontend repository.
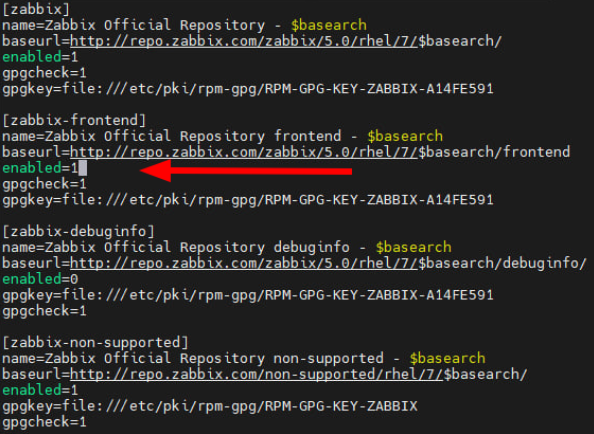
Install zabbix frontend package
sudo yum install zabbix-web-mysql-scl zabbix-apache-conf-sclTo import the Zabbix sample database into a Zabbix database that was created previously,
sudo zcat /usr/share/doc/zabbix-server-mysql*/create.sql.gz | mysql -uzabbix -p zabbixAfter importing the sample database, you can disable log_bin_trust_function_creators and log in to MySQL
sudo mysql -uroot -pAnd then input this command
set global log_bin_trust_function_creators = 0;
 quit;
Configuration of Zabbix Server
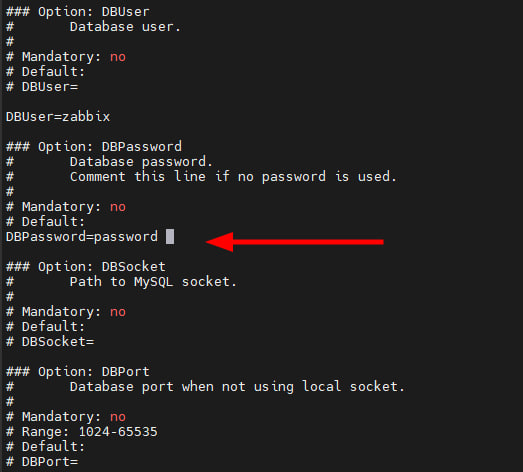
sudo vi /etc/zabbix/zabbix_server.confIn the database configuration file, change the 'DBPassword' parameter with the database password you created previously
Start and enable the Zabbix services
sudo systemctl start zabbix-server
sudo systemctl enable zabbix-server
sudo systemctl status zabbix-server
Configuration of Zabbix Agent
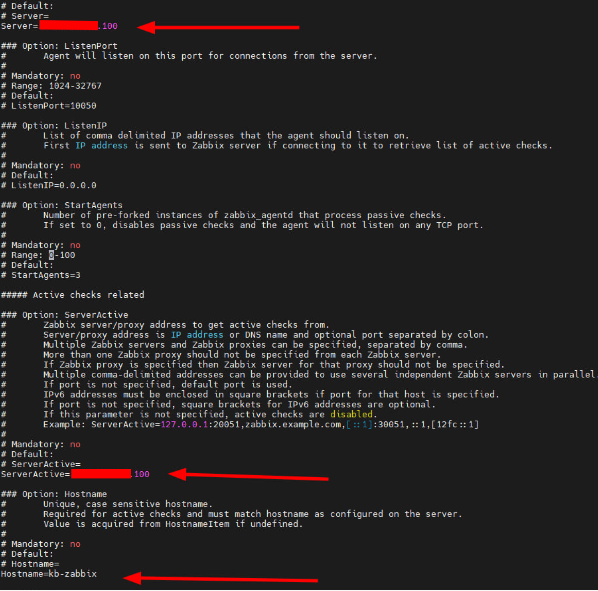
sudo vi /etc/zabbix/zabbix_agentd.confChanges this parameter:
Server : (ip server zabbix)
ServerActive : (ip server zabbix)
Hostame : (hostname VM)
Restart Agent Zabbix
sudo systemctl restart zabbix-agent
 sudo systemctl enable zabbix-agent
Configure time zone in PHP, input this command
sudo vi /etc/opt/rh/rh-php72/php-fpm.d/zabbix.conf php_value[date.timezone] = Asia/Jakarta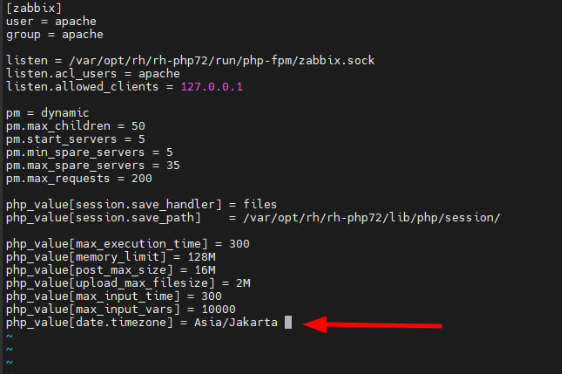
Restart the Web Server
sudo systemctl restart httpd
sudo systemctl enable httpd
Firewall Setting
Allow port 10051 (server) and port 10050 (agent) on ypur Virtual Machine
C. Konfigurasi Dashboard Monitoring Zabbix.
Open your browser and input the IP address of the VM where Zabbix is installed. For example, our example uses IP 103.xxx.xxx.100/zabbix, then you will be directed to the Zabbix dashboard page
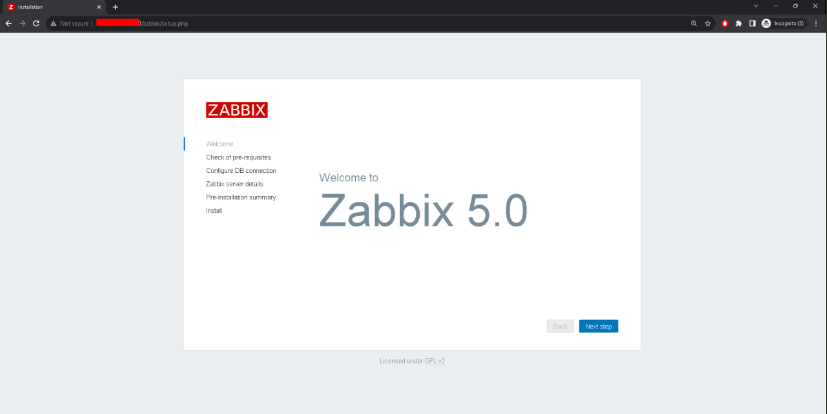
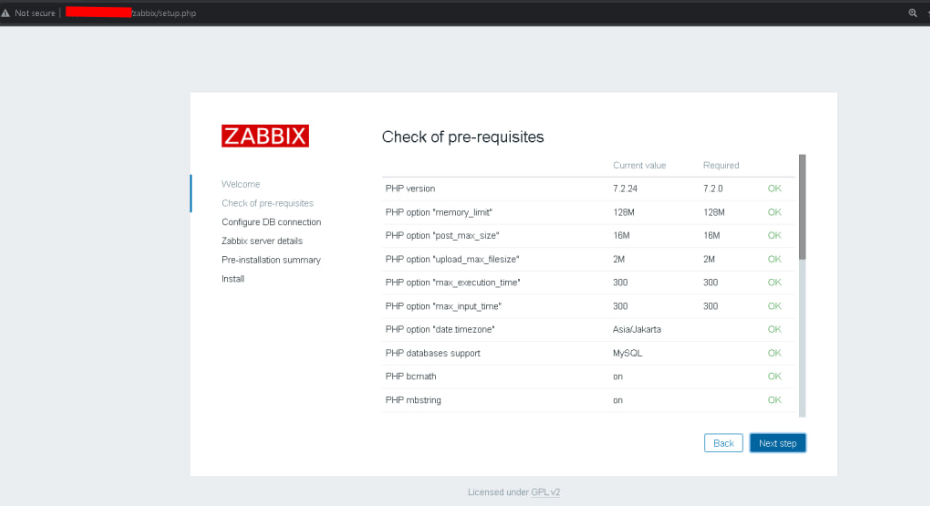
Click the Next button, then Zabbix will direct you to check the system requirements for installation, please check again if there are any errors
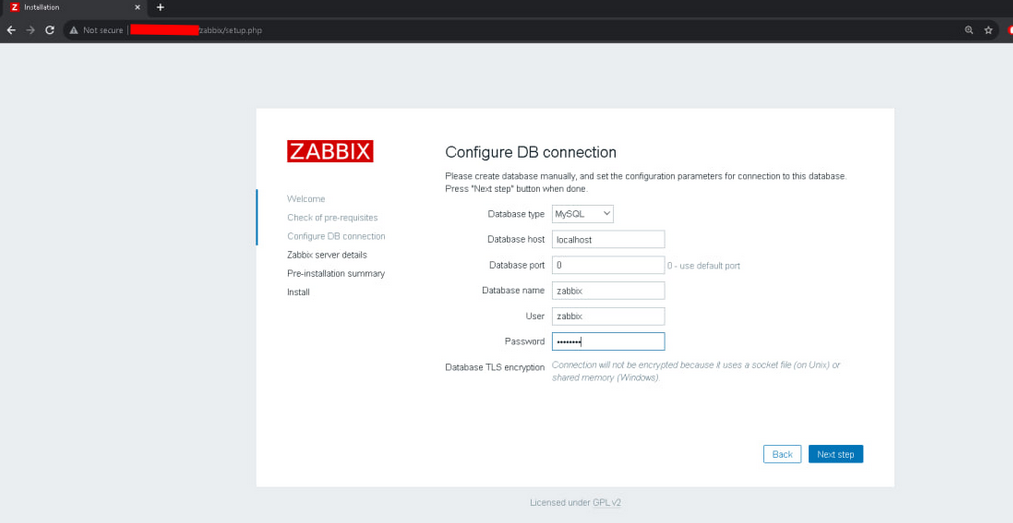
On this page you can input database information.
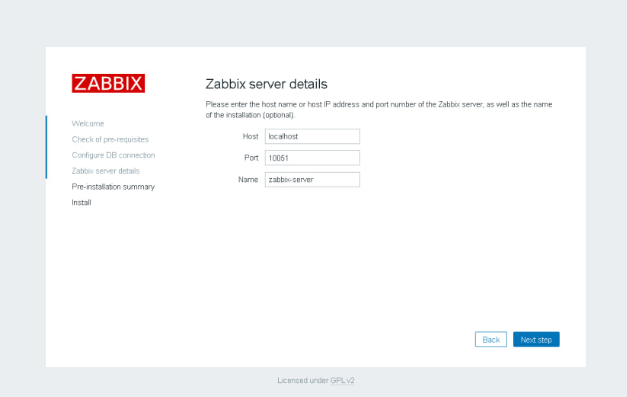
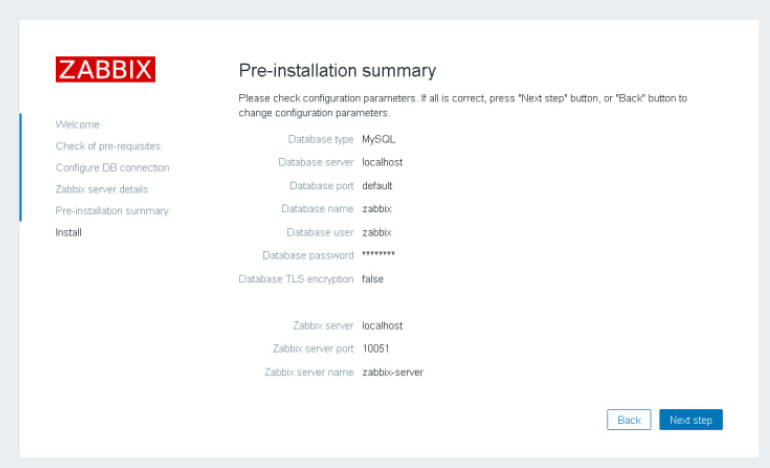
On this page, input the server details
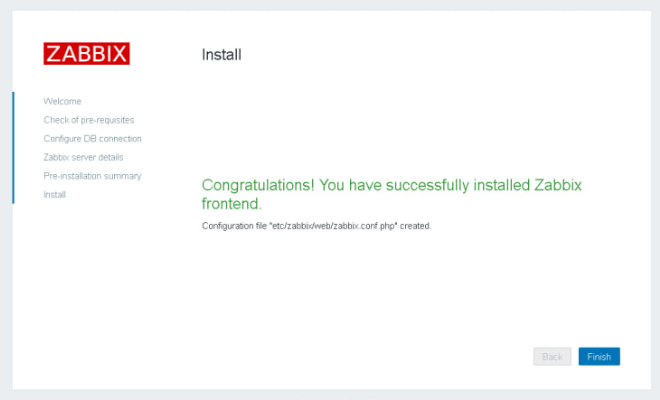
Zabbix monitoring tools have been successfully installed
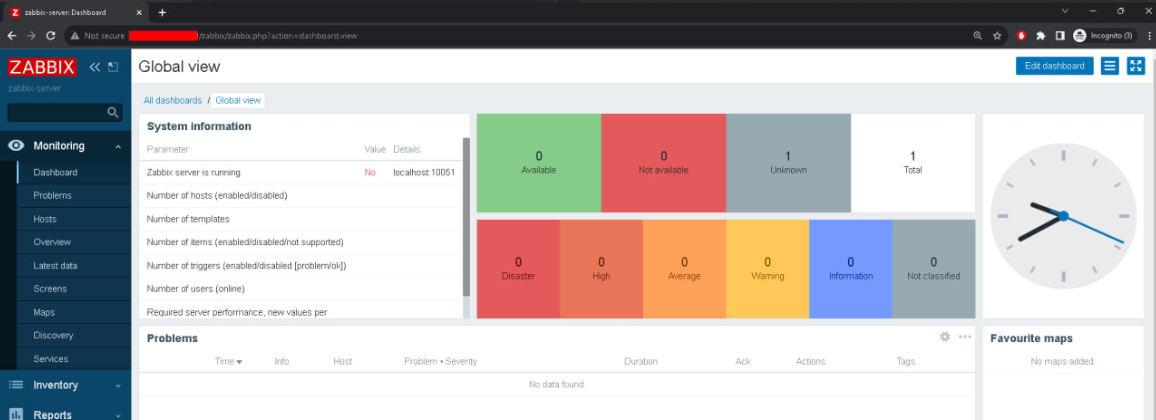
This is displayed for the Zabbix Dashboard, after successful installation. If you are asked for a username and password, the default is to use the Admin for user and the password is zabbix.
D. How to add a Zabbix agent that will be monitored.
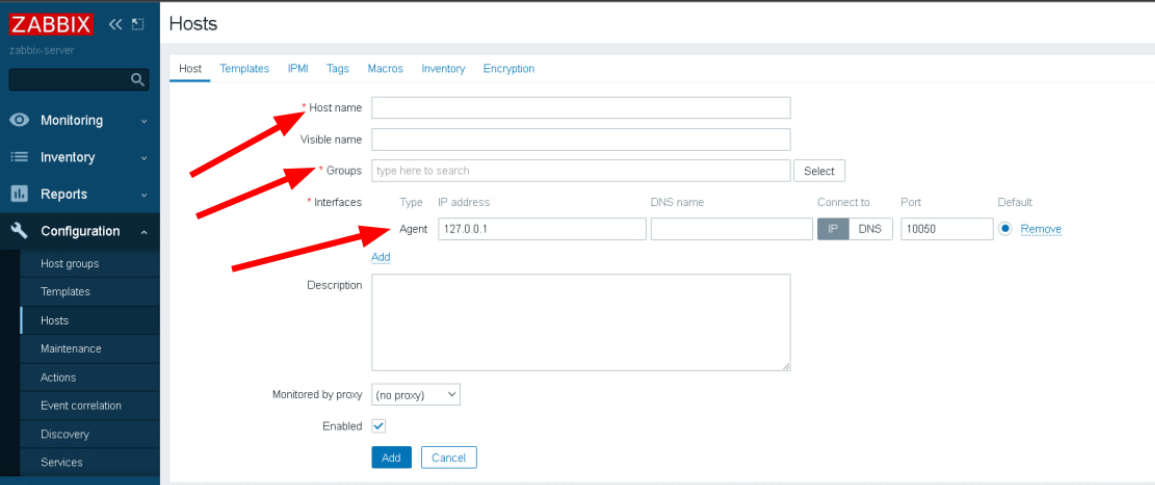
Open the Configuration >> Hosts >> Create Host
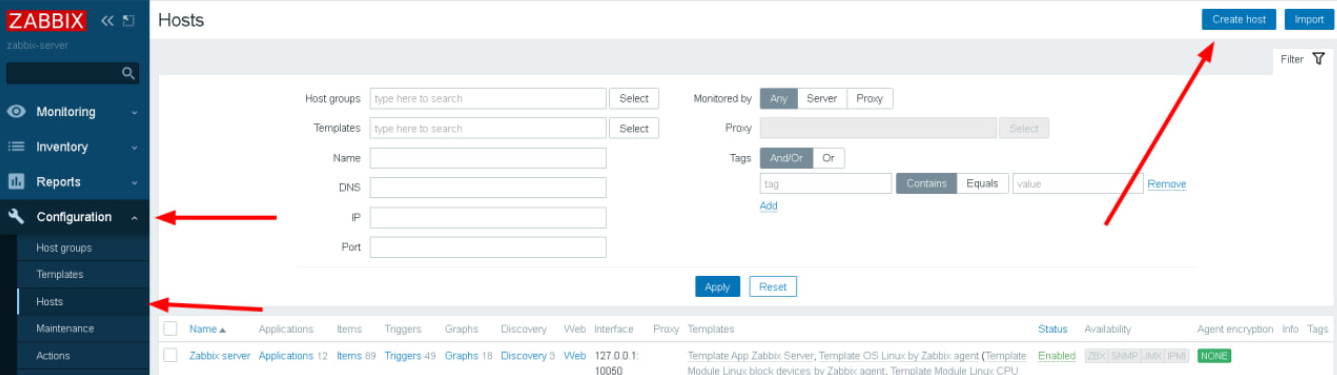
Enter the hostname and Public IP of the VM you want to monitor
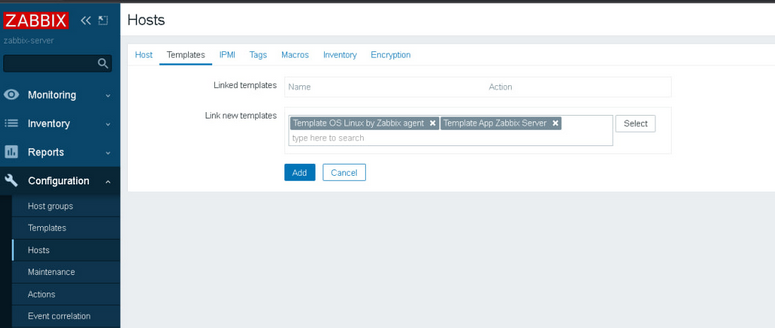
In the template section, enter the 2 templates that are provided by default by Zabbix. then click add
E. Monitoring
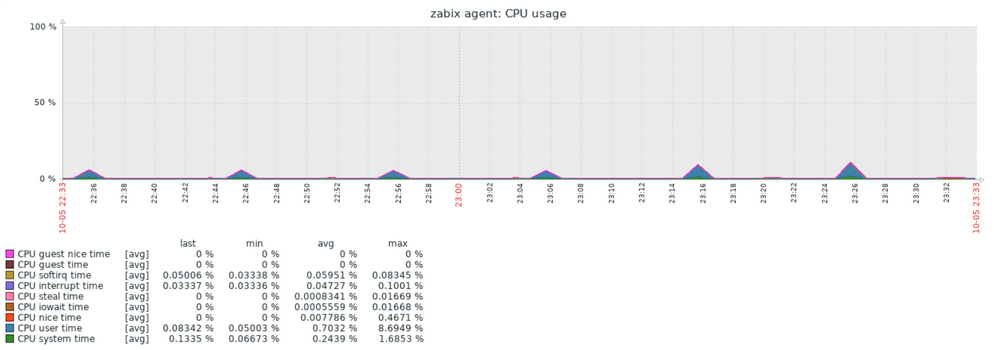
To see the VMs that have been monitored, you can check Monitoring >> Host >> select the host that will be monitored >> Graph
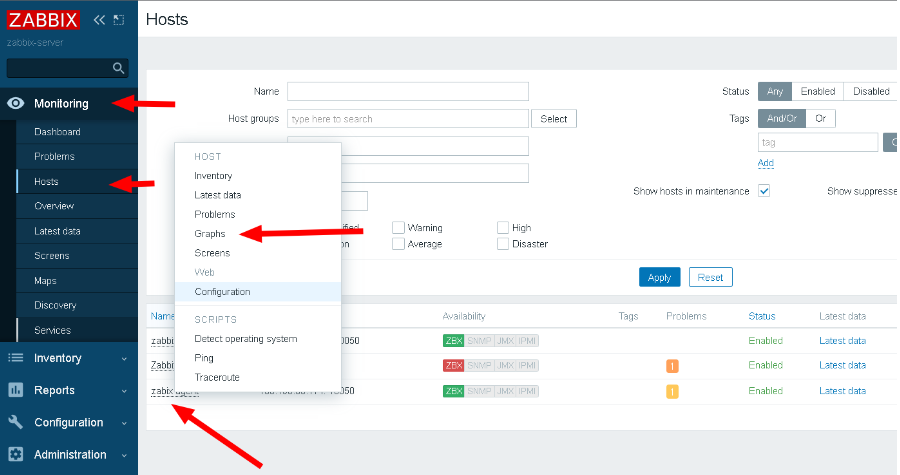
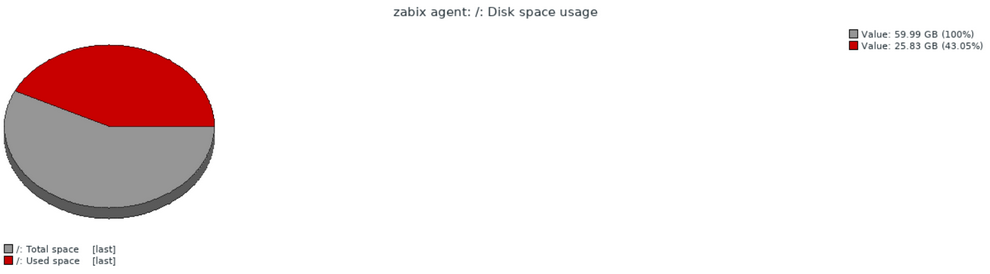
There will be information available according to the template you choose, for example CPU, disk and memory usage

F. Summary
This article provides a fairly detailed and comprehensive guide on how to implement and configure Zabbix for system monitoring in a CentOS 7 environment. It can be a valuable resource for those who want to understand and use this tool to manage their IT infrastructure more efficiently. Find help others via the Biznet Gio Knowledge Base. If you still have problems, please contact support@biznetgio.com or (021) 5714567.
Popular Articles
-
Cara Install & Konfigurasi Monitoring Cacti Serta Mengetahui Fungsi Fitur Pada Cacti
10 people say this guide was helpful
-
Cara Mengaktifkan Telnet pada Windows 7, 8 dan 10
4 people say this guide was helpful
-
Install dan Konfigurasi Samba Server pada Ubuntu
3 people say this guide was helpful
-
Jenis-Jenis Software Virtualisasi untuk Membuat Virtual Machine
6 people say this guide was helpful