Management NEO Object Storage Menggunakan Rclone
0 people liked this article
A. Pendahuluan
Rclone merupakan tools open source yang berfungsi untuk memanajemen cloud storage salah satunya untuk memanajemen layanan Neo Object Storage. Rclone memiliki berbagai fitur seperti transfer, copy, sync, move, check dan mount serta melayani local atau remote files melewati HTTP/WebDav/FTP/SFTP/dlna.
NEO Object Storage sendiri merupakan storage yang menggunakan protokol AWS S3 dimana storage ini mendukung API dari Amazon S3. Dengan layanan storage ini Anda dapat menggunakannya sebagai tempat menyimpan berkas apapun pada bucket yang dimiliki.
Pada tutorial kali ini penulis akan menjelaskan bagaimana cara memanajemen NEO Object Storage Menggunakan Rclone pada Windows.
Persiapan :
- Layanan NEO Object Storage
- Komputer dengan OS Windows
B. Penyelesaian :
Langkah 1 – Salin Data Bucket
Pastikan Anda telah membuat bucket pada layanan NEO Object Storage yang Anda miliki setelah itu Anda dapat melihat data storage pada Tab Storage & Backup di Portal Biznetgio Anda
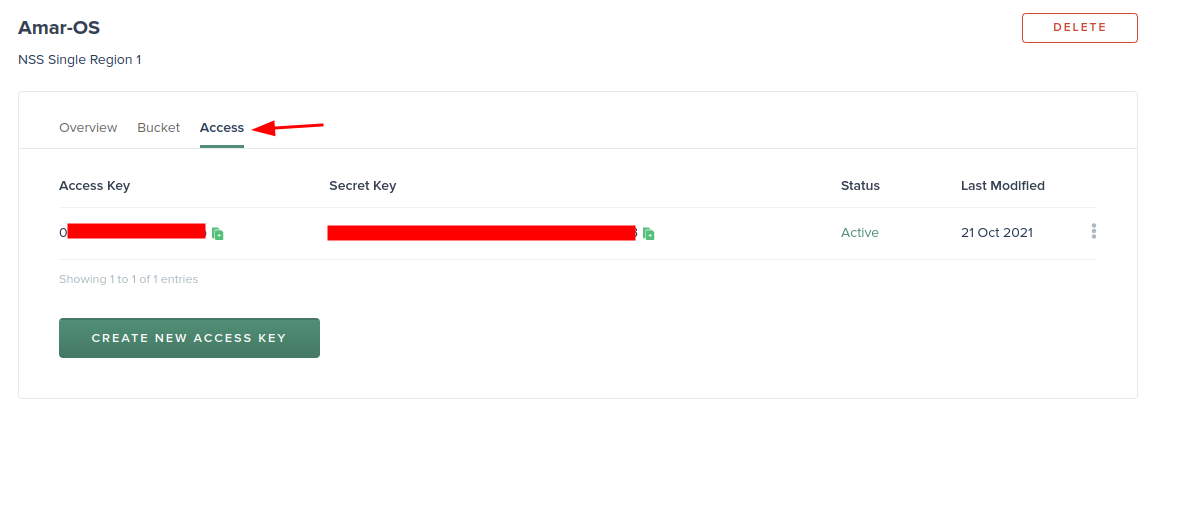
Berikut data yang perlu disalin yakni nama bucket (dapat dilihat pada Tab Bucket), REST Endpoint, access key dan secret key
Gambar 1. Menu NEO Object Storage
Gambar 2. Akses NEO Object Storage
Langkah 2 – Download Rclone
Anda dapat mendownload Rclone versi terbaru pada laman official berikut https://rclone.org/downloads/. Silakan mendownload sesuai OS yang Anda gunakan, pada kali ini penulis menggunakan windows.
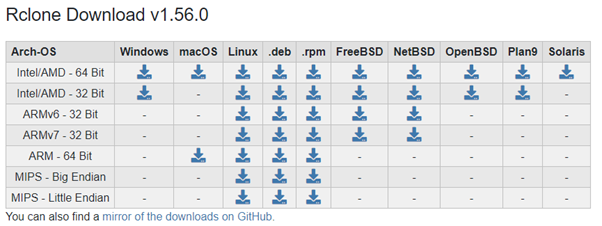
Gambar 3. Download Rclone
Setelah itu Anda dapat mengekstrak file download tersebut di directory yang and inginkan.
Langkah 3 – Menjalankan Rclone
Pada windows pengaksesan Rclone dapat dilakukan menggunakan command promt (cmd) dengan melakukan klik pada keyboard (windows + r) lalu ketik cmd.
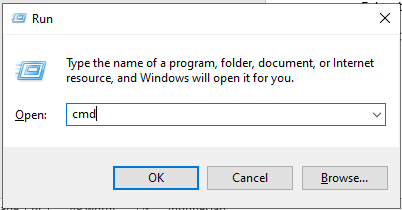
Gambar 4. Akses CMD
Setelah cmd terbuka silakan Anda dapat menuju directory rclone berada.
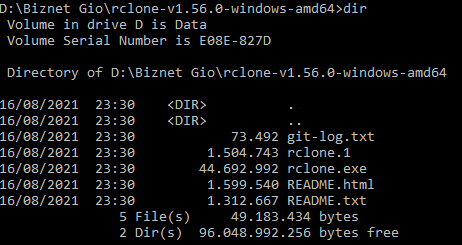
Gambar 5. Direktori Rclone
Kali ini kita akan menambahkan S3 Storage dengan menggunakan command berikut lalu ketik “n” untuk “new remote”
> rclone config No remotes found - make a new one
n) New remote
s) Set configuration password
q) Quit config
n/s/q> n
Masukkan nama storage yang diinginkan
name> NewOStorage
Kemudian ketik 4 untuk memilih Amazon S3 Compliant Storage
 Type of storage to configure.
 Enter a string value. Press Enter for the default ("").
 Choose a number from below, or type in your own value
  1 / 1Fichier
    \ "fichier"
  2 / Alias for an existing remote
    \ "alias"
  3 / Amazon Drive
    \ "amazon cloud drive"
  4 / Amazon S3 Compliant Storage Providers including AWS, Alibaba, Ceph, Digital Ocean, Dreamhost, IBM COS, Minio, SeaweedFS, and Tencent COS
    \ "s3"
  5 / Backblaze B2
    \ "b2"
  6 / Box
    \ "box"
  7 / Cache a remote
    \ "cache"
  8 / Citrix Sharefile
    \ "sharefile"
  9 / Compress a remote
    \ "compress"
 10 / Dropbox
    \ "dropbox"
 11 / Encrypt/Decrypt a remote
    \ "crypt"
 12 / Enterprise File Fabric
    \ "filefabric"
 13 / FTP Connection
    \ "ftp"
 14 / Google Cloud Storage (this is not Google Drive)
    \ "google cloud storage"
 15 / Google Drive
    \ "drive"
 16 / Google Photos
    \ "google photos"
 17 / Hadoop distributed file system
    \ "hdfs"
 18 / Hubic
    \ "hubic"
 19 / In memory object storage system.
    \ "memory"
 20 / Jottacloud
    \ "jottacloud"
 21 / Koofr
    \ "koofr"
 22 / Local Disk
    \ "local"
 23 / Mail.ru Cloud
    \ "mailru"
 24 / Mega
    \ "mega"
 25 / Microsoft Azure Blob Storage
    \ "azureblob"
 26 / Microsoft OneDrive
    \ "onedrive"
 27 / OpenDrive
    \ "opendrive"
 28 / OpenStack Swift (Rackspace Cloud Files, Memset Memstore, OVH)
    \ "swift"
 29 / Pcloud
    \ "pcloud"
 30 / Put.io
    \ "putio"
 31 / QingCloud Object Storage
    \ "qingstor"
 32 / SSH/SFTP Connection
    \ "sftp"
 33 / Sugarsync
    \ "sugarsync"
 34 / Tardigrade Decentralized Cloud Storage
    \ "tardigrade"
 35 / Transparently chunk/split large files
    \ "chunker"
 36 / Union merges the contents of several upstream fs
    \ "union"
 37 / Uptobox
    \ "uptobox"
 38 / Webdav
    \ "webdav"
 39 / Yandex Disk
    \ "yandex"
 40 / Zoho
    \ "zoho"
 41 / http Connection
    \ "http"
 42 / premiumize.me
    \ "premiumizeme"
 43 / seafile
    \ "seafile"
 Storage> 4
Ketik “14” untuk memilih “Any other S3 compatible provider”
 Choose your S3 provider.
 Enter a string value. Press Enter for the default ("").
 Choose a number from below, or type in your own value
  1 / Amazon Web Services (AWS) S3
    \ "AWS"
  2 / Alibaba Cloud Object Storage System (OSS) formerly Aliyun
    \ "Alibaba"
  3 / Ceph Object Storage
    \ "Ceph"
  4 / Digital Ocean Spaces
    \ "DigitalOcean"
  5 / Dreamhost DreamObjects
    \ "Dreamhost"
  6 / IBM COS S3
    \ "IBMCOS"
  7 / Minio Object Storage
    \ "Minio"
  8 / Netease Object Storage (NOS)
    \ "Netease"
  9 / Scaleway Object Storage
    \ "Scaleway"
 10 / SeaweedFS S3
    \ "SeaweedFS"
 11 / StackPath Object Storage
    \ "StackPath"
 12 / Tencent Cloud Object Storage (COS)
    \ "TencentCOS"
 13 / Wasabi Object Storage
    \ "Wasabi"
 14 / Any other S3 compatible provider
    \ "Other"
 provider>14
Lalu ketik “1” untuk Enter “AWS credentials in the next step”
Get AWS credentials from runtime (environment variables or EC2/ECS meta data if no env vars).
 Only applies if access_key_id and secret_access_key is blank.
 Enter a boolean value (true or false). Press Enter for the default ("false").
 Choose a number from below, or type in your own value
  1 / Enter AWS credentials in the next step
    \ "false"
  2 / Get AWS credentials from the environment (env vars or IAM)
    \ "true"
 env_auth> 1
Selanjutnya masukkan access key dan secrect key yang sebelumnya disalin
AWS Access Key ID.
 Leave blank for anonymous access or runtime credentials.
 Enter a string value. Press Enter for the default ("").
 access_key_id> (access key)
 AWS Secret Access Key (password)
 Leave blank for anonymous access or runtime credentials.
 Enter a string value. Press Enter for the default ("").
 secret_access_key> (secret key)
Selanjutnya klik “1” pada pemilih region dan masukkan endpoint yang sebelumnya disalin
Region to connect to.
 Leave blank if you are using an S3 clone and you don't have a region.
 Enter a string value. Press Enter for the default ("").
 Choose a number from below, or type in your own value
  1 / Use this if unsure. Will use v4 signatures and an empty region.
    \ ""
  2 / Use this only if v4 signatures don't work, e.g. pre Jewel/v10 CEPH.
    \ "other-v2-signature"
 region> 1
  Endpoint for S3 API.
 Leave blank if using AWS to use the default endpoint for the region.
 Enter a string value. Press Enter for the default ("").
 endpoint> nos.wjv-1.neo.id
Klik “Enter” untuk default
Location constraint - must be set to match the Region.
 Leave blank if not sure. Used when creating buckets only.
 Enter a string value. Press Enter for the default ("").
 location_constraint>
Selanjutnya dapat ketik “3” Granting this on a bucket is generally not recommended, kedepannya hak akses ini dapat diubah sesuai kebutuhan
Canned ACL used when creating buckets and storing or copying objects.

 This ACL is used for creating objects and if bucket_acl isn't set, for creating buckets too.

 For more info visit https://docs.aws.amazon.com/AmazonS3/latest/dev/acl-overview.html#canned-acl

 Note that this ACL is applied when server-side copying objects as S3
 doesn't copy the ACL from the source but rather writes a fresh one.
 Enter a string value. Press Enter for the default ("").
 Choose a number from below, or type in your own value
  1 / Owner gets FULL_CONTROL. No one else has access rights (default).
    \ "private"
  2 / Owner gets FULL_CONTROL. The AllUsers group gets READ access.
    \ "public-read"
    / Owner gets FULL_CONTROL. The AllUsers group gets READ and WRITE access.
  3 | Granting this on a bucket is generally not recommended.
    \ "public-read-write"
  4 / Owner gets FULL_CONTROL. The AuthenticatedUsers group gets READ access.
    \ "authenticated-read"
    / Object owner gets FULL_CONTROL. Bucket owner gets READ access.
  5 | If you specify this canned ACL when creating a bucket, Amazon S3 ignores it.
    \ "bucket-owner-read"
    / Both the object owner and the bucket owner get FULL_CONTROL over the object.
  6 | If you specify this canned ACL when creating a bucket, Amazon S3 ignores it.
    \ "bucket-owner-full-control"
 acl> 1
Selanjutnya dapat ketik “1” untuk None dan dapat ketik “n” untuk Default
Edit advanced config?
 y) Yes
 n) No (default)
 y/n> n
Selanjutnya dapat ketik “y” apabila informasi yang sebelumnya diinput sudah OK
 --------------------
 [NewOStorage]
 type = s3
 provider = AWS
 access_key_id = (access key)
 secret_access_key = (access key)
 endpoint = https://nos.wjv-1.neo.id
 location_constraint = ap-southeast-1
 acl = private
 --------------------
 y) Yes this is OK (default)
 e) Edit this remote
 d) Delete this remote
 y/e/d> y
Maka selesai Object Storage sudah ditambahkan.
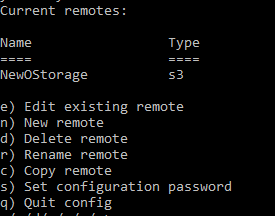
Gambar 6. Penambahan NEO Object Storage
Untuk melakukan edit konfigurasi bisa dapat masuk ke menu konfigurasi rclone lalu ketik “e”
$ rclone config
 > e
Langkah 4 – Membuat Bucket, Sinkron Local File dan Download File dari Bucket
Selanjutnya kita akan mencoba membuat bucket pada storage yang telah ditambahkan menggunakan command mkdir dengan contoh berikut:
$ rclone mkdir FauziOStorage:testbucketsatu
Apabila berhasil terbuat bisa dicek dengan menggunakan command lsd dengan contoh berikut
$ rclone lsd FauziOStorage:
Gambar 7. Membuat Bucket
Selannjutnya kita akan mencoba melakukan sinkronisasi dari file local ke bucket, pada kali ini penulis menggunakan directory D:\Testsync
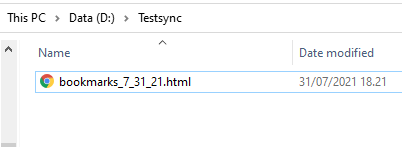
Gambar 8. Sinkronisasi
Untuk melakukan sinkronisasi dapat menggunakan format command sync dengan contoh berikut:
$ rclone sync D:\Testsync NewOStorage:testbucketsatu
Apabila ingin melakukan upload spesifik file tertentu dapat menulis command copy dengan contoh berikut:
$ rclone copy D:\Testsync\bookmarks_7_31_21.html NewOStorage:testbucketsatu
Untuk mengecek isi bucket dapat menggunakan command ls dengan contoh berikut:
$ rclone ls NewOStorage:testbucketsatu
Gambar 9. Cek Isi Bucket
Selanjutnya untuk melakukan download file dari bucket ke file local kita dapat menggunakan command copy dengan contoh berikut:
$ rclone copy NewOStorage:testbucketsatu/bookmarks_7_31_21.html bookmarks_7_31_21.html
Gambar 10. Copy File
C. Penutup
Selamat Anda sudah berhasil melakukan management file menggunakan rclone, sebagai management file yang dapat digunakan dimana saja
Semoga artikel ini dapat membantu Anda. Temukan bantuan lainnya melalui Knowledge Base Biznet Gio. Jika Anda masih memiliki kendala silahkan hubungi support@biznetgio.com atau (021) 5714567.
Popular Articles
-
Cara Install & Konfigurasi Monitoring Cacti Serta Mengetahui Fungsi Fitur Pada Cacti
11 people say this guide was helpful
-
Cara Mengaktifkan Telnet pada Windows 7, 8 dan 10
4 people say this guide was helpful
-
Install dan Konfigurasi Samba Server pada Ubuntu
4 people say this guide was helpful
-
Jenis-Jenis Software Virtualisasi untuk Membuat Virtual Machine
7 people say this guide was helpful

